| “ | Let's see what I can use against our Lieutenant Hagen. | ” |
| — Garrett | ||
Framed is the third mission in Thief II: The Metal Age. Accepting a well-paying job from an unidentified third party, Garrett enters Shoalsgate Station to frame one of the top members of the City Watch.
Overview[]
Late at night, an unusual opportunity comes knocking on Garrett's door. A man has a job for Garrett too sensitive to go through the usual channels and claims that an old contact of his told him where to find him. When Garrett was about to ask who this contact was the visitor managed to distract him by a large amount of money.
The job is to break into Shoalsgate Station, headquarters of the City Watch, and quietly frame Lieutenant Hagen for robbing the evidence vault. Hagen is the right-hand man of Sheriff Truart and probably has made life difficult for someone he shouldn't have.
The visitor has given Garrett all the information he needs to pull this off, including a very detailed map of the building. All he needs to do is choose a way in, plan his route, and get back out without alerting the City Watch or their newly installed alarm system.
Objectives[]
- Go to Lt. Hagen's office and grab a personal item of his to be used for framing him.
- Drop the personal item in the vault on the third floor.
- Steal the strongbox from the vault and leave it in Lt. Hagen's office.
- Leave Shoalsgate Station.
- The Mechanists have installed an alarm mechanism in Shoalsgate Station that can be triggered by either mechanical eyes or the guards. Don't let them set off the alarm. (Hard/Expert)
- The frame won't stick if the City Watch suspects you were involved.
- Don't knock out or kill more than five guards. (Normal)
- Don't knock out or kill more than two guards. (Hard)
- Don't knock out or kill anyone. (Expert)
Gear[]
Starting Gear[]
- 10 Broadhead Arrows (5 on Expert)
- 10 Water Arrows
- 3 Moss Arrows
- 3 Noisemaker Arrows
- 2 Rope Arrows
- 2 Healing Potions
- 2 Invisibility Potions (none on Expert)
- 1 Flash Bomb
- 1 Scouting Orb
- Lockpicks
Shop[]
- 20 Broadhead Arrows
- 8 Water Arrows
- 3 Moss Arrows
- 3 Noisemaker Arrows
- 2 Rope Arrows
- 2 Healing Potions
- 1 Invisibility Potion
- 1 Slow-fall Potion
- 2 Scouting Orbs
- Tip
Characters present in the Mission[]
| Type | Count | Notes | ||
|---|---|---|---|---|
| Normal | Hard | Expert | ||
| Sheriff Sword Guard | 8 | 9 | 9 | On Hard/Expert some of the guards get upgraded to sheriff Helmet Guards and a few guards are added such as the guard at the third floor guard post. |
| Sheriff Bow Guard | 4 | 6 | 6 | Philbert is added, guarding the stairs to the records hall, and a sword guard at the southern stairs guard post is replaced by a bow guard. |
| Sheriff Helmet Guard | 0 | 4 | 4 | |
| Sheriff Sergeant | 1 | 1 | 1 | In a conference room along with Lady Rumford. |
| Mechanist Worker | 1 | 1 | 1 | Brother Artus |
| Nobleman | 1 | 1 | 1 | Lady Rumford |
| Prisoner | 7 | 7 | 7 | The man on the torture rack, plus the ones in the Holding Cells (one of them being an Unarmed Pagan). |
| Harmless Apparition | 1 | 1 | 1 | A Haunt patrolling the Holding Cells. |
Storyline Characters[]
- Lady Rumford
- Brother Artus
- Schmidt - in solitary
Difficulty Alterations[]
Normal[]
The fewer number of guards, the five knock-outs/kills, and the possibility to let the alarm go of makes this setting much easier than the other two. Officer Philbert, who is normally guarding the stairs to the Records Hall, and the guard at the Third Floor alarm post are missing, allowing for easier access to these areas. A somewhat important difference is the appearance of a drunk Sword Guard guarding the southern stairs to the second floor. He is very unaware of his surrounding making him rather easy to sneak past. Even when he spots Garrett he will only press the alarm button and will not chase or attack him making him bypassable if the alarm is disabled. He gets replaced by a Sheriff Bow Guard on higher difficulties.
Hard and Expert[]
There will be an increased number of guards, and some Sheriff Sword Guards are upgraded to Sheriff Helmet Guards. On the ground floor, some patrol paths are modified so that the west part of the building is especially tricky.
There are a few differences in the available tools found in the mission. The Armory has less tools on each higher difficultly setting. For Expert, the breath potion in Shoalsgate Utility Building is removed, the invisibility potion in the locker room is replaced with a healing potion, and there is one less water arrow in the main office and toilet room. Also, the invisibility potion in Sheriff Truart's office is gone as well as the flash bomb and healing potion in Lieutenant Hagen's office.
A unique difference on Normal is that some letters are displayed on their desks while on Hard and Expert they are wrapped up in a paper-basket. Lastly, the offices of Sheriff Gorman Truart and his lieutenants are open on Normal but locked on Hard and Expert.
Walkthrough[]
Loot List[]
Total loot:
- Normal/Hard/Expert: 1058 Gold + 50 Gems + 270 Goods = 1378 Total Loot
Loot list: Keeper's Chapel
Secrets[]
Total secrets: 9
Secret 1[]

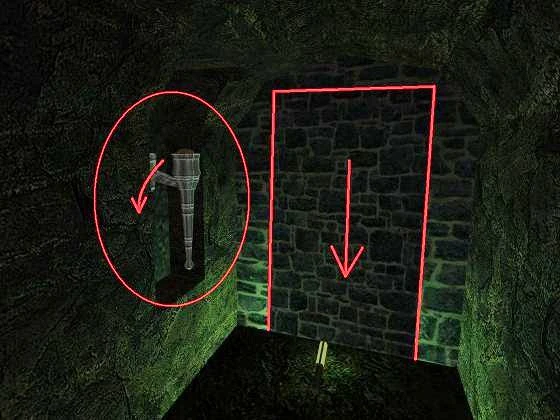
Location: Basement, underground pool chamber or Maintenance Area.
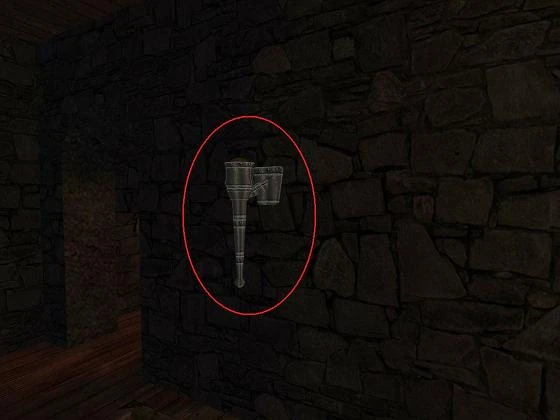
Claiming: In the underground pool chamber head trough the west tunnel and turn the torch at the end, or use the right switch in the Maintenance Area.
Loot: No loot, but passage from the underground pool chamber to the Maintenance Area.
Secret 2[]
Location: Basement
Claiming: In the underground pool chamber head trough the north tunnel and turn the torch at the end, or use the torch in the hallway to the prison.
Loot: No loot, but passage from the underground pool chamber to the prison area.
Secret 3[]
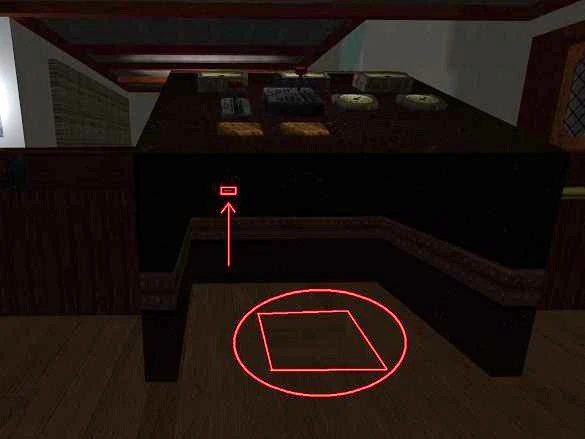
Location: First Floor, Front Desk.
Claiming: Underneath the alarm panel there is a small button. Pushing it will open a hidden compartment just bellow it.
Loot: 4 gold coin stacks, worth 25 gold each.
Secret 4[]
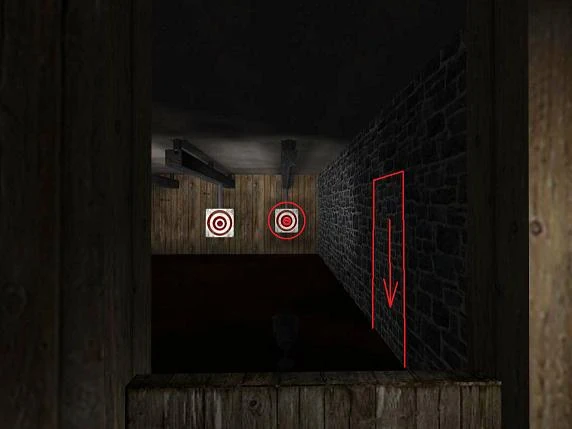
Location: First Floor, Target Range.
Claiming: Hit the bulls eye on the far right target with a broadhead arrow, or go to the target itself and press the button in its center. The wall on the right will slide down giving access to the Armory.
Loot:
- Normal: 1 invisibility potion, 4 healing potions, 1 flash bomb, 1 scouting orb, 6 water arrows, 2 moss arrows and 2 noisemaker arrows.
- Hard: 1 healing potion, 1 scouting orb, 4 water arrows, 2 moss arrows and 1 noisemaker arrow.
- Expert: 1 scouting orb, 3 water arrows, 1 moss arrow and 1 noisemaker arrow.
Secrets 5 and 6[]
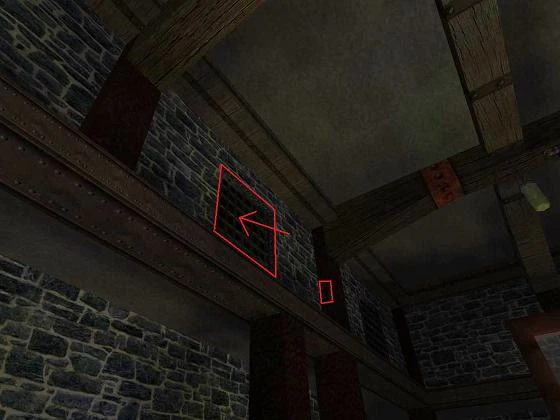
Location: Either First Floor, Main Office or Second Floor, Records Hall.
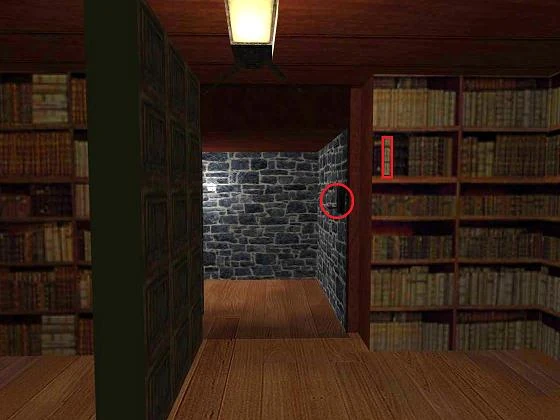
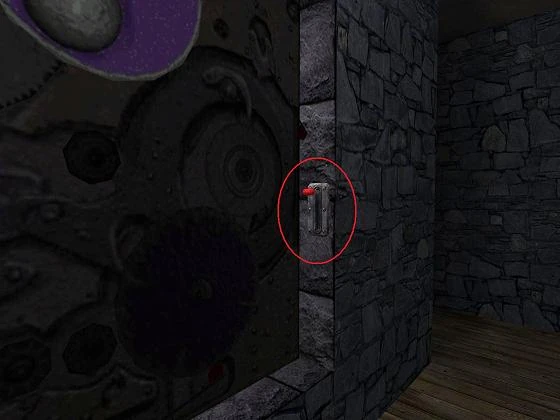
Claiming: On the east wall of the Main Office there are 4 air vents near the ceiling. Next to the second from right there is a lever. Pulling it will move the vent and open a secret passage to the upper floor. To reach the opening shoot a Rope Arrow into the wooden beams near to it. Another option is to gain access from the other side, in the far end of the Records Hall, by pulling the book next to the fake bookcase. This is the only secret in this mission that is treated as a double secret meaning that both entry and exit point give a score to the secrets found.
Loot: No loot, but passage from the Main Office to the Records Hall.
Secret 7[]
Location: First Floor, Main Office or Southeast corridor.
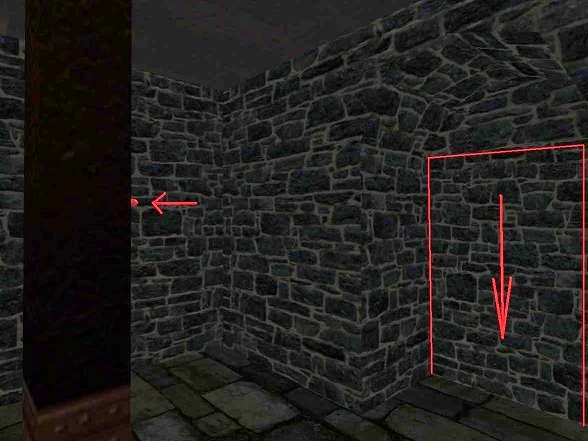
Claiming: On the south-east corner of the Main Office there is a switch on a metal pillar that opens a secret passage in the alcove near to it. This passage can also be opened by a torch on the other side.
Loot: No loot, but passage from the Main Office to the Southeast corridor.
Secret 8[]
Location: Either First Floor, Training Room or Second Floor, Sheriff Truart's Office.
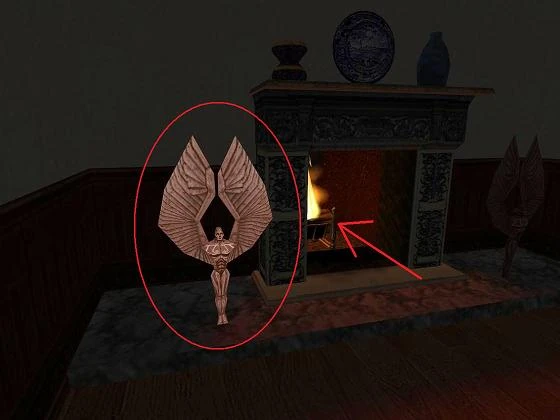
Claiming: In the small side room on the west end of the Training Room there is a movable torch. Turn it to open a secret passage North of the balcony. Climb on the balcony (by shooting a rope arrow at a wooden beam on the ceiling) and go to the hidden space behind the clock. Then pull the lever at the back of the clock’s mechanism to gain access to sheriff Truart’s office. To open the passage from the other side, use the statue on the left side of the fireplace and the switch in the Northeast of the hidden space.
Loot: No loot, but passage from the Training Room to Sheriff Truart's Office.
Secret 9[]
Location: Second Floor, Warden Affairs or Third Floor, Southeast Room.
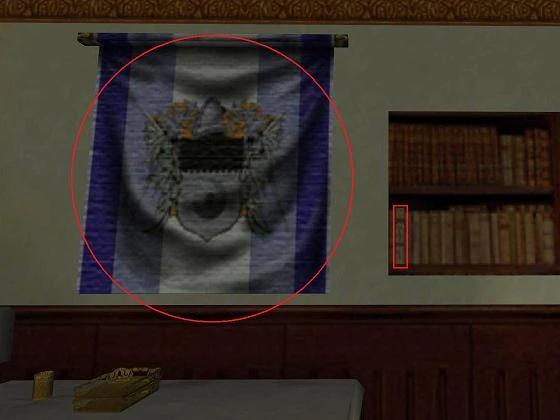
Claiming: In the Warden Affairs, pull the book at the North wall next to the banner or the book in the Southeast room on the Third Floor.
Loot: No loot, but passage from the Warden Affairs to the Third Floor.
Tips[]
- Don't forget to get the Secure Records/Vault key, the vault code and the personal item before going to the vault; also don't forget to drop the personal item when leaving.
- It is possible to use the dumb waiter in the Mess Hall to go to the Second Floor.
- Disable the alarm system in the main office so that it can't be turned on.
Easter Eggs[]
The Dancing Zombies[]
")
")
Near the start of the mission there are two Collector Towers on a large pedestal with a tall wall on the left. Throw a Scouting Orb over the wall, or use a slowfall potion to see what's on the other side.
Trivia[]
- This was the first mission where a Mechanist appeared (Brother Artus) and where the name of Karras was mentioned.[1]
- In the main office lies a note of paper under watch officer Morgan’s chair that reads "!!!KICK ME!!!".[2]